

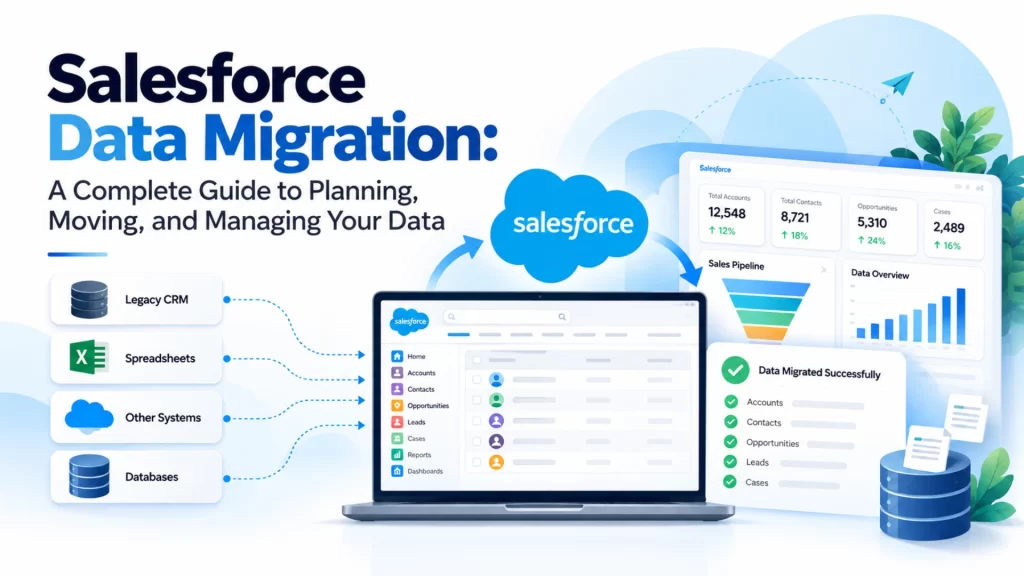
Moving business data to Salesforce is more than copying records from one system to another. A successful migration requires careful planning, data cleaning, accurate field mapping, testing, and user training.
Many businesses migrate to Salesforce to improve customer management, streamline sales processes, connect different systems, and make better business decisions. However, if the migration is not planned properly, companies may face duplicate records, missing information, broken relationships, incorrect reports, and business disruptions.
The good news is that these problems can be avoided with the right approach.
This guide explains Salesforce data migration in simple terms, including why it matters, how to prepare your data, which tools to use, how to test the migration, and what to do after moving to Salesforce.
What Is Salesforce Data Migration?
Salesforce data migration is the process of transferring business information from an existing system into Salesforce.
The data may come from an old CRM, spreadsheets, databases, another Salesforce organization, or different business applications.
For example, a company moving from an older CRM to Salesforce may need to transfer:
- Customer and company records
- Contacts and business relationships
- Sales leads and opportunities
- Activities, tasks, and meeting history
- Products, quotes, and contracts
- Customer service cases
- Custom business records and historical information
The goal is to make sure that important business information is available in Salesforce in the correct format and can be used by the relevant teams.
Data Migration vs. CRM Migration
These terms are related, but they do not mean exactly the same thing.
Data migration focuses on transferring records and their information from one system to another.
CRM migration is a broader process that may also include rebuilding workflows, automations, reports, dashboards, integrations, user permissions, and other system settings.
For example, moving customer records into Salesforce is data migration. Moving those records while also rebuilding sales automation, connecting email systems, and configuring user access is part of a wider CRM migration.
Understanding this difference helps businesses plan the right scope, budget, and timeline.
Why Do Businesses Migrate Data to Salesforce?
Companies migrate their data to Salesforce for several business and technical reasons.
1. Business Growth
An older CRM may not support a growing number of customers, users, or business processes. Salesforce provides a platform that businesses can configure as their requirements change.
2. Replacing Legacy Systems
Some businesses still depend on outdated software or spreadsheets. Migrating to Salesforce can help centralize information and reduce manual work.
3. Improving Data Visibility
When customer information is spread across multiple systems, teams may struggle to get a complete view of each customer. Moving relevant data into Salesforce can improve visibility across sales, service, and marketing.
4. Integrating Business Applications
Companies may need to connect Salesforce with accounting software, ERP systems, marketing platforms, customer support tools, or other applications.
5. Mergers and Business Restructuring
When businesses merge, acquire another company, or reorganize their operations, they may need to consolidate data from multiple systems or Salesforce organizations.
6. Supporting New Salesforce Features
A company may introduce new Salesforce products, custom applications, or AI-powered capabilities. Preparing and migrating the right data helps support these initiatives.
7. Improving Data Quality and Reporting
Migration provides an opportunity to identify duplicate records, correct inconsistent values, and establish better data management practices.
However, migration alone does not guarantee better data quality. Businesses must also establish rules for maintaining accurate information after the move.
The Three Main Phases of Salesforce Data Migration
A successful Salesforce migration can be divided into three main phases:
- Preparation and planning
- Data migration and execution
- Quality assurance and user acceptance testing
Each phase has a different purpose, but all three are equally important to the overall project.
Phase 1: Prepare and Plan the Migration
Preparation is the foundation of a successful migration. Before transferring any records, the team should understand the existing data, the target Salesforce structure, and the business requirements.
Step 1: Define the Project Goals
Start by identifying why the business needs the migration.
For example, the goals may include:
- Moving customer records from a legacy CRM to Salesforce
- Consolidating data from multiple systems
- Improving the accuracy of customer information
- Reducing manual data entry
- Maintaining historical sales and service records
- Preparing Salesforce for new integrations and automation
Document the project scope, budget, timeline, responsibilities, dependencies, and success criteria.
Clear goals help the team decide what to migrate and how to measure the results.
Step 2: Audit the Existing Data
Before moving data, review the source system carefully.
Identify which objects, tables, spreadsheets, fields, and records contain the information needed by the business.
Check for:
- Duplicate customer and contact records
- Missing emails, phone numbers, or other important fields
- Incorrect or inconsistent formats
- Outdated records
- Unused custom fields
- Invalid references between related records
- Sensitive or restricted information
For example, the same company might appear as “ABC Technologies,” “ABC Technology,” and “ABC Tech.” These records may represent one organization and should be reviewed before migration.
A data audit helps estimate the amount of work required and highlights problems that could affect the migration.
Step 3: Decide What Data to Migrate
Not every record from the old system needs to be transferred.
Migrating unnecessary information increases the workload, testing requirements, storage usage, and long-term maintenance effort.
Work with business stakeholders to classify data into three groups:
- Migrate: Records required for current business operations.
- Archive: Historical records that must be retained but are rarely needed in daily Salesforce workflows.
- Exclude: Unnecessary, duplicate, or irrelevant data that can be removed according to approved retention policies.
For example, an inactive customer record may not need to be migrated if it has no business or compliance value. However, it should not be excluded simply because it is old. Legal retention requirements, reporting needs, and historical relationships must be considered.
The objective is to move useful, accurate, and necessary data not everything that exists.
Step 4: Identify the Source of Truth
Businesses often store similar information in different systems.
For example, customer details may exist in a CRM, billing information in an accounting system, and product information in an ERP.
The team must decide which system provides the authoritative value for each type of data.
A source-of-truth document should specify:
- The system responsible for each data category
- The person or team responsible for the information
- How conflicting records will be resolved
- Which values should take priority during migration
This prevents the team from importing conflicting or outdated information.
Step 5: Understand the Salesforce Data Structure
Before mapping the source data, review the target Salesforce organization.
Identify the standard and custom objects, fields, relationships, validation rules, required fields, record types, and automation that will affect the migration.
Common Salesforce objects include:
- Accounts: Companies or organizations
- Contacts: People associated with accounts
- Leads: Potential customers
- Opportunities: Potential sales deals
- Cases: Customer service requests
- Tasks and Events: Activities and interactions
Custom objects may also be required for industry-specific information, contracts, assets, projects, or other business processes.
The Salesforce structure should be ready before the team begins loading production data.
Step 6: Create a Data Mapping Document
Data mapping defines how information from the source system will be transferred into Salesforce.
For each field, document the source field, target object, target field, transformation rules, required status, and validation requirements.
For example:
| Source field | Salesforce field | Mapping rule |
|---|---|---|
| Company_Name | Account.Name | Trim extra spaces |
| First_Name | Contact.FirstName | Preserve valid text |
| Last_Name | Contact.LastName | Ensure the value is present |
| Email_Address | Contact.Email | Validate email format |
| Mobile_No | Contact.MobilePhone | Standardize formatting |
| Old_Customer_ID | Legacy_Customer_ID__c | Preserve original ID |
The example uses illustrative field names. The actual mapping depends on the source system and the Salesforce configuration.
It is also important to distinguish field mapping from data transformation.
Field mapping determines where a field goes. Data transformation determines how the value should change before it is loaded.
For example, the values “UK,” “United Kingdom,” and “Great Britain” may need to be standardized according to the business’s approved country-value rules.
Review the mapping document with business stakeholders before starting the migration.
Step 7: Clean and Standardize the Data
Poor-quality data is one of the most common reasons Salesforce migrations become difficult.
Data cleaning should address the issues that could cause errors, create duplicates, or affect business processes.
Important activities include:
- Identifying and reviewing duplicate records
- Correcting missing or invalid values
- Standardizing dates, phone numbers, addresses, and country names
- Removing unnecessary spaces and formatting inconsistencies
- Checking email addresses and other key identifiers
- Validating picklist values against Salesforce configuration
- Reviewing records that do not have valid parent relationships
Automated tools can identify possible duplicates, but complex cases may require manual review.
For example, two contacts with the same name might be different people. Merging them without checking their email addresses, company details, and activity history could result in data loss.
Focus on making the data accurate enough for the migration and establishing ongoing data governance for future maintenance.
Step 8: Plan Data Security and Backups
Business data may contain customer details, financial information, personal information, or confidential records.
Before migration, establish appropriate security controls.
The team should:
- Restrict access to authorized project members
- Use secure methods to transfer and store files
- Follow applicable privacy and retention requirements
- Back up the source data before making changes
- Protect exported files containing sensitive information
- Define a recovery and rollback plan
- Confirm who can approve access to production data
Keep a verified backup in a secure location separate from the primary working environment where appropriate.
A backup is useful only if the team can restore it when needed. Recovery procedures should therefore be documented and tested.
Phase 2: Execute the Salesforce Data Migration
Once the data, mappings, and Salesforce configuration are ready, the team can begin transferring records.
The process should start with testing and proceed to production only after the required checks are complete.
Step 9: Choose the Right Migration Tool
Salesforce offers several tools for importing, exporting, and managing data. The right option depends on record volume, data complexity, automation requirements, and the team’s technical skills.
Salesforce Data Import Wizard
The Data Import Wizard is a built-in Salesforce tool suitable for straightforward imports.
It is useful for smaller datasets, supported standard and custom objects, and situations where users want a guided import process.
It supports common operations such as adding new records and updating existing records for supported objects.
The available objects, operations, and record limits depend on the tool’s current capabilities and configuration.
Salesforce Data Loader
Data Loader is useful for more advanced data operations and larger datasets.
It supports operations such as insert, update, upsert, export, and delete.
It also provides success and error files, helping the team identify records that were loaded successfully and those that require correction.
Data Loader is particularly useful when preserving legacy IDs, updating existing records, and maintaining relationships across multiple objects.
Its practical limits depend on the current version, configuration, and execution environment. Check official Salesforce documentation before planning a migration around a specific record limit.
Salesforce CLI
Salesforce CLI is useful for scripted and repeatable operations.
Technical teams can use it to automate parts of a migration workflow, manage Salesforce metadata, and execute supported data commands.
It is a good option when migrations need to be repeated across development, testing, and production environments.
MuleSoft and Third-Party Migration Tools
MuleSoft and specialist migration platforms may be appropriate when data comes from multiple systems, requires complex transformations, or needs ongoing synchronization.
These tools can support more advanced integration workflows, depending on the product and configuration.
They may require additional licensing, implementation effort, and technical expertise.
How should you choose?
| Requirement | Suitable starting point |
|---|---|
| Simple, small imports | Data Import Wizard |
| Larger or more complex record operations | Data Loader |
| Repeatable, script-based processes | Salesforce CLI |
| Multiple systems and complex integrations | MuleSoft or a suitable third-party tool |
Evaluate the actual requirements before selecting a tool. A larger dataset does not automatically mean that an expensive integration platform is necessary.
Step 10: Configure a Sandbox and Test Environment
Never make your first full migration attempt in production.
Use an appropriate Salesforce Sandbox to test the process and identify problems before the actual launch.
Prepare the necessary objects, fields, permissions, validation rules, automation, and integrations in the target environment.
The team should also verify that the test environment represents the relevant production configuration closely enough to produce useful results.
Test representative records, including:
- Normal records with complete information
- Records with optional fields left blank
- Records with special characters
- Records with multiple relationships
- Records that may trigger automation
- Records with values that require transformation
Record the errors, fix their causes, and repeat the test until the results meet the agreed acceptance criteria.
Step 11: Load Records in the Correct Order
Salesforce records often depend on other records.
For example, a contact may belong to an account, and an opportunity may be associated with an account and one or more contacts.
Loading records in the wrong order can create missing relationships or failed imports.
A typical loading sequence might be:
- Reference data and required parent records
- Accounts
- Contacts and leads, according to the target design
- Opportunities and related records
- Activities, cases, and other dependent objects
- Additional custom objects and junction records
The exact order depends on the Salesforce schema and business relationships. Some objects may need to be loaded earlier or later based on dependencies.
For every migrated record, preserve the original system ID in an appropriate legacy-ID field whenever possible.
This makes it easier to identify records, prevent duplicates, update existing records, and reconnect related data.
For example, if an account has the legacy ID ACC-1001, the migration process can use that identifier to find the corresponding Salesforce account when loading its contacts.
Where supported and appropriately configured, an external ID field can help the team match records and maintain relationships across imports.
Step 12: Use Batches for Large Datasets
Loading a very large dataset in one operation can make failures difficult to investigate and recover from.
Breaking the migration into manageable batches helps the team track progress and isolate problems.
For each batch:
- Prepare and validate the input data.
- Execute the import or update operation.
- Review success and error files.
- Correct failed records.
- Retry the records that can be safely retried.
- Record the results before moving to the next batch.
Batch sizes should be selected based on record volume, automation, API limits, dependencies, and performance.
For larger migrations, the team should also consider API consumption, processing time, validation rules, and the impact of triggers and flows.
Do not disable automation or validation rules simply to make the migration faster without assessing the business impact and obtaining the necessary approvals.
Step 13: Plan the Production Cutover
The production cutover is the point at which the final migration takes place and users begin working with the new Salesforce environment.
A cutover plan should define:
- The date and time of the migration
- The people responsible for each activity
- The period during which source data changes will be restricted or synchronized
- The final extraction and loading process
- The handling of records created or updated during migration
- The verification and business approval steps
- The rollback decision and recovery procedure
- The communication plan for affected users
For example, a company may complete an initial data load before launch and then transfer only the records changed since that load during the cutover.
This approach can reduce downtime, but it requires reliable tracking of changes and a tested process for resolving conflicts.
The team should not announce the migration as complete until the agreed technical and business checks have passed.
Phase 3: Quality Assurance and User Acceptance Testing
Loading records into Salesforce does not mean the migration is complete.
The team must confirm that the information is accurate, the relationships are correct, the system behaves as expected, and users can perform their everyday work.
Step 14: Validate Record Counts
Compare the number of records in the source system with the number loaded into Salesforce.
For example, if the migration scope contains 10,000 accounts, the team should account for all 10,000 records.
If only 9,850 records were loaded, investigate the missing 150 records.
The difference may be caused by invalid data, duplicate-handling rules, rejected records, or an approved exclusion.
The important point is that every difference must be understood and documented.
Record counts should be checked for each object and migration batch, not just for the dataset as a whole.
Step 15: Check Data Accuracy and Relationships
Record counts alone cannot prove that the migration is correct.
A record might exist in Salesforce but contain the wrong email address, sales stage, owner, or account relationship.
Verify:
- Field values against the source data
- Required fields and important business identifiers
- Account-contact relationships
- Opportunity-account relationships
- Record ownership
- Converted lead handling, where applicable
- Historical activities and related records
- Picklist and status transformations
- Custom object relationships
Use automated comparisons where possible and manually review representative records.
Pay special attention to financial values, customer identifiers, ownership, and information used in business-critical reporting.
Step 16: Test Automation, Reports, and Integrations
Data migration can affect more than the records themselves.
Salesforce validation rules, flows, triggers, integrations, and reports may behave differently when the data structure or values change.
Test the business processes that depend on migrated information.
For example:
- Does an opportunity move through the correct sales stages?
- Are the correct users assigned to new records?
- Do service cases follow the expected routing rules?
- Are dashboards displaying accurate totals?
- Are integrations sending and receiving the correct information?
- Do notifications and scheduled processes work correctly?
Where automation creates or updates records during a migration, check for unexpected side effects and duplicate creation.
Step 17: Conduct User Acceptance Testing (UAT)
User acceptance testing allows business users to confirm that Salesforce supports their actual work.
Technical teams should prepare test scenarios based on everyday business activities.
For example, sales representatives might create leads, update opportunities, review customer history, and generate reports. Service teams might open cases, review contact information, and check previous customer interactions.
Ask users to confirm:
- They can find the records they need.
- The information is accurate and complete.
- Related records are connected correctly.
- Their permissions are appropriate.
- Their workflows operate as expected.
- Reports support their business decisions.
Document each issue, assign an owner, and track it until it is resolved or formally accepted.
UAT should be scheduled realistically so that business users have enough time to test the system without disrupting their regular responsibilities.
Step 18: Obtain Business Sign-Off
Before closing the migration, confirm that the agreed acceptance criteria have been met.
The project team should document the final record counts, unresolved errors, approved exclusions, test results, and known limitations.
Business stakeholders should approve the migration based on the agreed scope and risk level.
If important defects remain, the team should decide whether to correct them before launch or postpone the cutover. Critical data loss, broken relationships, or failed business processes should not be ignored simply to meet a deadline.
Common Salesforce Data Migration Challenges and How to Avoid Them
Even well-planned projects can face problems. Identifying the most common challenges helps teams prepare effective solutions.
1. Duplicate Records
Problem: The same customer or company appears multiple times, making reports unreliable and confusing users.
Solution: Identify duplicates before migration, establish matching rules, and review uncertain matches carefully. Configure appropriate duplicate-management processes for ongoing data quality.
2. Incorrect Field Mapping
Problem: Information is imported into the wrong field or converted into an incorrect value.
Solution: Maintain a mapping document, review it with business stakeholders, and test representative records in a Sandbox before production.
3. Missing Record Relationships
Problem: Contacts, opportunities, or custom records are not linked to the correct parent records.
Solution: Preserve legacy identifiers, define relationships in the mapping document, and load parent records before dependent records where required.
4. Missing or Invalid Data
Problem: Required fields are blank, dates are invalid, or values do not match Salesforce field requirements.
Solution: Validate and clean the source data before import. Keep error files and resolve rejected records systematically.
5. Unexpected Automation Errors
Problem: Flows, triggers, or validation rules prevent records from loading or produce unwanted changes.
Solution: Test the migration against the target configuration, identify automation dependencies, and agree on any temporary changes before executing them.
6. Downtime and Business Disruption
Problem: The migration takes longer than expected, preventing users from working normally.
Solution: Estimate the duration through test runs, use suitable batches, plan the cutover window, communicate with users, and prepare a recovery plan.
7. Inaccurate Reports and Dashboards
Problem: Reports show different totals because records were omitted, fields were mapped incorrectly, or historical values were transformed.
Solution: Capture baseline figures, validate important reports, and compare results against the approved migration scope.
8. Poor User Adoption
Problem: Employees continue using spreadsheets or the old system because they do not understand the new Salesforce processes.
Solution: Provide role-based training, practical documentation, support after launch, and clear guidance on how users should maintain data quality.
9. Unexpected Project Delays
Problem: The team discovers missing requirements, incomplete Salesforce configuration, or complex data relationships late in the project.
Solution: Complete an early data audit, confirm dependencies, involve source-system experts, and allow sufficient time for testing and defect resolution.
A rushed migration can create long-term data quality problems, often called data debt. Fixing the root cause is usually more sustainable than repeatedly correcting individual records.
Salesforce Data Migration Best Practices
The following practices can improve migration quality, reduce risk, and make the process easier to manage.
- Start with a clear plan. Define scope, ownership, dependencies, timelines, and acceptance criteria before beginning the migration.
- Move only necessary data. Review which records must be migrated, archived, or excluded.
- Clean the data early. Resolve duplicates, missing values, and inconsistent formats before loading.
- Document all mappings. Record field relationships, transformations, and exception-handling rules.
- Preserve legacy IDs. Use appropriate external ID fields to identify source records and maintain relationships.
- Test in a Sandbox. Complete trial migrations and correct errors before production.
- Load records according to dependencies. Establish a loading sequence that supports the target data model.
- Track every batch. Maintain logs, success files, error files, and reconciliation results.
- Protect sensitive data. Apply access controls, secure transfers, backups, and appropriate retention policies.
- Validate business processes. Test automation, integrations, reports, and user permissions in addition to the records.
- Prepare users for the change. Train teams before launch and provide ongoing support.
- Monitor data quality after launch. Use duplicate rules, validation, ownership policies, and regular reviews to keep Salesforce data reliable.
How Long Does Salesforce Data Migration Take?
The time required depends on the volume and quality of the data, the complexity of the Salesforce configuration, the number of source systems, and the testing requirements.
A simple migration involving a small, clean dataset may take a few weeks. A larger migration involving multiple systems, custom objects, historical records, complex relationships, and integrations may take several months or longer.
The overall schedule should include:
- Requirements gathering and planning
- Source data audit and cleanup
- Salesforce configuration and mapping
- Trial migrations
- Error correction and retesting
- Production migration and cutover
- User acceptance testing
- Training and post-launch support
The time needed to move records is only one part of the project. Data preparation, dependency management, and business validation can require just as much attention.
How Much Does Salesforce Data Migration Cost?
There is no single price for Salesforce data migration. The cost depends on the amount of data, the number of systems involved, the complexity of transformations, the available tools, and the level of support required.
Typical cost factors include:
- Data extraction and preparation
- Duplicate removal and data cleansing
- Field mapping and transformation development
- Salesforce configuration and customization
- Migration tool licenses, where applicable
- Integration development
- Testing and reconciliation
- Project management and user training
- Cutover planning and post-launch support
A business moving a few clean spreadsheets into standard Salesforce objects may need a relatively small budget. A company consolidating several legacy systems with complex integrations may need a substantially larger investment.
To estimate costs accurately, assess the source data, confirm the migration scope, and run a representative test migration before finalizing the project budget.
Salesforce Data Migration Checklist
Use this checklist to track the key activities before, during, and after migration.
Before Migration
- Define project goals, scope, budget, and timeline.
- Identify stakeholders and assign responsibilities.
- Audit the source data and its quality.
- Decide which records to migrate, archive, or exclude.
- Identify the source of truth for each data category.
- Review the target Salesforce objects and fields.
- Prepare and approve the data mapping document.
- Clean duplicates and standardize values.
- Preserve legacy identifiers and document relationships.
- Back up the source data and prepare a recovery plan.
- Select the migration tools and prepare the Sandbox.
During Migration
- Complete a trial migration.
- Review and resolve test errors.
- Load parent and reference records before dependent records where required.
- Use appropriate batch sizes.
- Track successful, failed, and excluded records.
- Verify record relationships and ownership.
- Monitor performance, API consumption, and automation.
- Follow the approved production cutover plan.
After Migration
- Reconcile source and target record counts.
- Validate field values and relationships.
- Review error files and resolve outstanding issues.
- Test automation, reports, dashboards, and integrations.
- Complete user acceptance testing.
- Obtain business sign-off.
- Train users and provide support documentation.
- Monitor system performance and data quality.
- Confirm the retention and handling of old-system data.
Conclusion
Successful Salesforce data migration requires careful planning, accurate data mapping, data cleansing, and thorough testing.
Startbit IT Solutions helps businesses with Salesforce consulting, custom development, data migration, system integration, and implementation. Our goal is to help you migrate data securely, improve data quality, and build a Salesforce solution aligned with your business needs.
Planning your Salesforce migration? Contact Startbit IT Solutions to discuss your requirements and find the right solution for your business.